
Your Guide to Using an eSIM for Travel Without the Hassle
An eSIM for travel is a digital SIM card embedded in your phone, replacing the need for a physical plastic card. You simply scan a QR code from a provider to activate a local data plan instantly, avoiding roaming fees and airport kiosks. This means you stay connected with affordable, seamless coverage across multiple countries without swapping SIMs. It gives you the freedom to land, turn on your phone, and start navigating or sharing immediately.
Why Your Next Trip Needs a Digital SIM
Your next trip will be smoother when you stop hunting for plastic SIMs at airport kiosks. With a digital SIM, you can preload the plan before you leave, so connectivity begins the instant you land. No more fumbling with tiny trays or worrying about losing your home card. Instead, you keep your local number active for bank alerts while adding esim for travel data alongside it—no physical swap needed. Picture stepping off a plane in Bangkok and already having maps, ride-hailing, and translation tools ready. That’s the real shift: you travel through the arrival hall, not a telecom queue. You land connected, not searching for a signal.
- Activate coverage before departure and avoid arrival-day stress entirely.
- Keep your home SIM active for two-factor authentication and emergency calls.
- Switch between local carriers instantly if one network slows down in a city.
- Save time and hassle by not carrying spare SIMs or adapters for different countries.
How Embedded SIMs Differ From Physical Plastic Cards
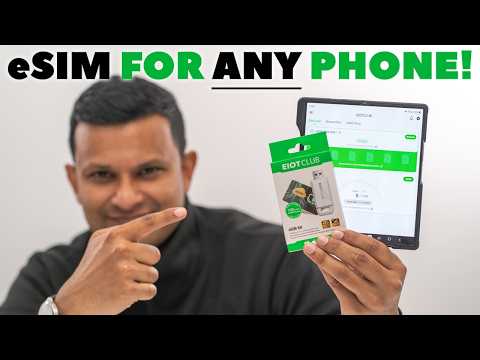
Unlike a physical plastic SIM that you need to buy, find, and physically swap in your phone, an embedded SIM (eSIM) is built directly into your device. For travel, this means you can purchase and install a local data plan from an app before you even leave home. You never have to fumble with a SIM tray or risk losing that tiny plastic card. While a physical SIM ties you to one carrier per slot, an eSIM lets you store multiple profiles and switch between them on the fly. This makes bouncing between a home plan and a tourist data pass seamless. That said, some older budget phones still lack eSIM support, so checking your device’s compatibility is a necessary first step.
No More Hunting for Local Shops at Arrival
With an eSIM, instant travel connectivity eliminates the need to search for local shop kiosks upon arrival. The process is entirely digital: first, you purchase a compatible eSIM plan online before departure. Second, you receive a QR code or activation profile via email. Third, upon landing, you simply scan the code or install the profile, connecting to a local network within minutes. No SIM-fitter stall, no passport copies, no tiny plastic card to juggle. This transforms the initial luggage-collection scramble from a connectivity quest into a seamless, immediate switch—directly from your seat on the plane.
The Environmental Edge of Skipping the Plastic
Every physical plastic SIM card, from production to disposal, carries an environmental footprint tied to petroleum-based materials and logistics. By skipping the plastic entirely, eSIMs eliminate this waste stream. For frequent travelers, the cumulative impact is significant; you never need to discard a SIM card after leaving a country. A single eSIM profile replaces dozens of potential plastic cards over your travel lifetime. Zero-waste connectivity becomes a practical, immediate benefit, as your device simply downloads a new data profile without any physical resource consumption.
Q: How does skipping the plastic directly reduce my travel footprint? A: It removes the manufacture, packaging, and disposal of physical cards, preventing non-biodegradable plastic waste from ending up in landfills or oceans after one-time use.
Top Providers That Keep You Connected Abroad
For reliable connectivity abroad, top providers like Airalo and Holafly offer user-friendly eSIM solutions. Airalo provides extensive country-specific and regional data plans, allowing you to purchase and install an eSIM before departure. Holafly stands out with its popular unlimited data plans across many destinations, ensuring seamless browsing without worrying about data caps. Ubigi excels with strong coverage in Japan and parts of Europe, while Flexiroam offers a unique global data package for multi-stop trips. These providers eliminate physical SIM swaps, letting you maintain your primary number for calls while using the eSIM for data.
Global Giants Versus Regional Specialists
When choosing an eSIM, you’ll face global giants like Airalo or Holafly versus regional specialists. Global players offer broad but sometimes pricier coverage, working in many countries with one plan. Regional specialists, however, often provide cheaper, faster data with local network partnerships for specific areas like Europe or Asia. If you’re visiting a single region, the specialist’s tailored performance usually beats the giant’s one-size-fits-all approach. Your pick hinges on itinerary: globe-trotters value simplicity, while focused travelers get better value with regional specialist eSIMs for dedicated connectivity.
Pay-As-You-Go Plans vs. Unlimited Data Packages
When choosing between pay-as-you-go plans and unlimited data packages for travel eSIMs, your trip style decides the winner. For short city breaks or light usage like maps and WhatsApp, pay-as-you-go eSIMs save you money since you only buy a small top-up. Unlimited packages work best for digital nomads or heavy streamers who need constant connectivity without stress. Here’s how to pick:
- Determine your daily data needs—under 1GB per day favors pay-as-you-go.
- Check trip length—a week of heavy use makes unlimited plans cheaper per day.
- Remember that “unlimited” often throttles after a fair-use cap, while pay-as-you-go gives full speed until your allowance runs out.
Setting Up Before You Board the Plane
To ensure seamless connectivity upon arrival, set up your eSIM before you board the plane. Purchase and download your travel eSIM plan from the provider’s app or website while on Wi-Fi. Install the eSIM profile immediately, labeling it clearly (e.g., “Japan Data”) to avoid confusion with your primary line. Do not activate the plan yet; most eSIMs allow a future start date or manual activation. Disable your primary SIM’s data roaming to prevent accidental charges once airborne. Finally, verify the eSIM shows as installed in your device’s cellular settings, and save a screenshot of your installation instructions as offline backup. This pre-boarding checklist removes any need to troubleshoot upon landing.
Checking Device Compatibility Across Brands
Before purchasing an eSIM for travel, verify your device’s compatibility across different brands like Apple, Samsung, or Google. Check device model and region because an eSIM-unlocked US iPhone may not mirror a carrier-locked Asian variant. Visit the manufacturer’s support site or use a carrier’s IMEI tool, not generic lists. Some Samsung models allow eSIM only in specific firmware versions, requiring a manual update. Pixel devices often have carrier restrictions that block eSIM activation abroad.
Cross-brand compatibility hinges on confirming your exact model, region, and carrier lock status—never assume brand means automatic eSIM support.
Installing a Profile in Under Two Minutes
Once you’ve purchased your eSIM, installation is a rapid, two-minute affair. Simply scan the provided QR code or tap the direct installation link sent via email. Your device automatically detects the profile, prompting you to add a cellular plan. After tapping “Add,” the profile installs instantly, eliminating any physical SIM swaps or airport kiosk queues. There’s no complex configuration; the eSIM pre-loads all necessary APN settings. For seamless activation, ensure you’re on a stable Wi-Fi connection before starting. This process delivers instant eSIM travel activation directly to your phone, ready for use upon landing.
Installing an eSIM profile takes under two minutes via QR scan or link, automatically configuring your device for immediate travel use.
Common Activation Pitfalls to Sidestep
Don’t let a simple activation mistake derail your trip. First, avoid installing your eSIM mid-flight or upon arrival, where spotty or zero connectivity can prevent downloading the profile entirely. Another common trap is activating the plan while your physical SIM is still active, causing network conflicts. Disable your primary SIM before installation. Also, verify that your device is carrier-unlocked and updated to the latest OS; outdated settings are a frequent culprit. Finally, never delete the eSIM from your device unless you have a backup or QR code saved, as re-downloading mid-trip can be impossible without Wi-Fi.
To sidestep pitfalls: install eSIM before traveling, disable your primary SIM, ensure your phone is unlocked and updated, and always save your activation QR code.
Navigating Multiple Networks While Moving Between Countries
When moving between countries, an eSIM for travel lets you switch networks instantly by downloading new profiles without physical swaps. To navigate this, install multiple eSIMs from regional providers before departure, then manually select the active line in your device settings as you cross borders. This avoids automatic, often costly, roaming. Q: How do I prevent a previous country’s network from lingering? A: Enable “Turn on this line” only for your active profile and disable the China eSIM others. Always test your data connection immediately after switching, as some networks require a manual carrier selection to lock onto the strongest local signal.
Automatic Roaming Versus Manual Carrier Selection
When using an eSIM for travel, automatic roaming connects you to the strongest local network without intervention, ensuring instant connectivity upon crossing borders. However, manual carrier selection gives you control to lock onto a specific network, which is crucial for avoiding expensive partner networks or poor signal. Opting for manual carrier selection on eSIMs prevents unintended network hopping that can drain data allowances or cause instability. This deliberate choice often yields more consistent speeds in border zones or congested cities.
- Automatic roaming prioritizes convenience but may connect you to premium-cost partner networks.
- Manual carrier selection lets you pin a specific eSIM network profile for predictable performance.
- Switching manually can resolve failed connections by cycling through available providers.
Handling Border Crossings Without Dropping Signal
Crossing a border can sever a data connection for minutes while your device hunts for a new tower, but modern travel eSIMs handle this by pre-loading multiple network profiles. Your phone automatically switches to a local partner carrier the instant it detects a foreign signal, often within the same minute. This eliminates manual APN toggling or SIM swapping, which are major causes of dropped signal. However, keep data roaming enabled in settings; some eSIMs require it to trigger the handoff.
Q: Will my connection drop completely when crossing borders?
No, if your eSIM supports automatic network selection, the transition is seamless, though you might experience a 10-20 second lag as it authenticates with the new carrier.
Managing Data Usage When You’re Off the Grid
When you’re off the grid with an eSIM for travel, managing data usage is about pre-loading maps and offline tools before you lose signal. The key is to switch your phone to airplane mode once you enter a dead zone, then manually toggle only the eSIM back on for occasional checks. Q: What’s the first step to avoid wasting data off-grid? A: Disable automatic app refreshes and background sync in your settings before you leave coverage. Save your eSIM data for essential tasks like messaging or checking a route, not for streaming. This way your travel eSIM lasts longer, keeping you connected even when major networks drop out.
Prioritizing Maps, Messaging, and Light Browsing
When off-grid, carve out your data allowance by prioritizing maps, messaging, and light browsing over media-heavy apps. Pre-download entire offline map regions before you lose signal, then use your eSIM’s precious megabytes strictly for real-time GPS corrections and traffic reroutes. Reserve data for plain-text messaging apps—turn off media auto-download and send photos only over Wi-Fi. For occasional lookups, force your browser into “Lite” mode and kill background tabs. This trio ensures you never get lost, stay reachable, and can quickly check a menu or bus schedule without burning through your travel eSIM plan.
Using VoIP Calls Without Blasting Through Your Allowance
VoIP calls, like those via WhatsApp or Skype, can wreck your eSIM data if you leave video on. Stick to audio-only calls over Wi-Fi whenever possible to avoid draining your allowance. WhatsApp audio uses roughly 1MB per minute, while a video call can eat 20MB or more. Before traveling, open your VoIP app’s settings and disable auto-download for media. This prevents huge files from silently chewing data during a call.
Q: How can I test a VoIP call without burning data? A: Use your eSIM’s free trial data, or connect to a public Wi-Fi hotspot to make a short test call and check your app’s data tracker.
Staying Secure on Public and Unknown Networks
When using an eSIM for travel, staying secure on public and unknown networks means avoiding automatic connections. Your eSIM’s data plan doesn’t protect you from hackers on open Wi-Fi in cafes or airports. Always use a VPN with your eSIM to encrypt activity, even on hotel networks. Turn off Wi-Fi and Bluetooth when not in use to prevent your device from automatically joining unsecured hotspots. Your eSIM itself is safer than physical SIMs, as thieves can’t physically remove it, but your online behavior still matters—never log into sensitive accounts on unknown networks without extra protection like two-factor authentication.
Why a Virtual Number Can Protect Your Privacy
When using public Wi-Fi, your real phone number can be exposed to packet sniffers or rogue hotspots. A virtual number, provisioned through your eSIM, acts as a logical intermediary. It routes calls and texts through an encrypted tunnel, severing any direct link between the network and your personal SIM identity. Even if an attacker intercepts traffic, they only see the temporary, disposable virtual number. This creates a clean separation, ensuring your permanent contact details remain unseen and untraceable on any untrusted infrastructure. Privacy via number abstraction is thus a fundamental layer of travel security.
Why does a virtual number stop data leakage on shared networks? Because SMS or voice data bound for your real number never actually traverses the public network; the virtual number acts as a remote proxy, receiving the data and securely forwarding it through your eSIM’s dedicated channel.
Encrypting Traffic With a Companion VPN
When using an eSIM for travel, pairing it with a companion VPN encrypts all data between your device and a secure server, shielding traffic from snoopers on public Wi-Fi. This prevents anyone on the same network—such as hotel or airport hotspots—from intercepting your login credentials or personal files. For maximum protection, follow this sequence:
- Install and log into your VPN before connecting to any public network.
- Verify the VPN is active by checking its connection status icon.
- Enable your eSIM data or connect to the unknown Wi-Fi.
This ensures eSIM data encryption remains seamless, routing every packet through a tunnel immune to local threats.
Swapping Between Personal and Travel Plans Effortlessly
An eSIM lets you instantly switch between your home number and a local travel data plan without fumbling with physical SIM cards. You simply activate the travel eSIM before departure, then toggle it on in your phone’s settings when you land, keeping your primary line available for calls and SMS. This means you can manage both identities from one device, avoiding roaming fees while still receiving two-factor authentication codes from your bank. The key is deactivating your home line’s data while leaving it active for calls, preserving your local plan’s high-speed allowance. No need to visit a store or hunt for Wi-Fi—your connectivity shifts seamlessly as you cross borders.
Keeping Your Home Number Active for Banks and Alerts
Switching to a travel eSIM does not require sacrificing access to financial accounts. Keeping your home number active for banking verification is critical, as many institutions require SMS-based two-factor authentication. You can forward calls to a VoIP service or use a dual-SIM setup, where your physical SIM retains the home number for alerts while the eSIM handles data. Porting your number to a secondary device is an alternative, though it introduces hardware dependency. Without this active number, one-time passwords and fraud alerts from your bank may fail, locking you out of accounts mid-trip.
- Enable Wi-Fi calling on your home number to receive SMS over the eSIM’s data plan.
- Check that your bank supports app-based authenticators as a fallback for SMS alerts.
- Set up temporary forwarding for urgent calls to a travel-friendly number.
Dual SIM Tactics for Heavy Business Users
For heavy business users, a dual SIM strategy leverages the phone’s physical SIM for the primary corporate line while assigning a travel eSIM for data in the destination country. This allows you to route all business calls and messages through your home number without roaming fees, while the eSIM handles high-volume data for apps like Slack and Zoom. Configure the device to use the eSIM for mobile data and the physical SIM for voice and SMS. Set call forwarding rules so missed calls on either line are captured by your voicemail, ensuring no client communication drops.
Dual SIM tactics for heavy business users mean keeping your primary corporate line active on the physical SIM while using an eSIM for high-speed local data, avoiding roaming charges and maintaining seamless client communication.
What Happens When You Return Home
When you return home from traveling with an eSIM, your active data plan typically expires or deactivates automatically based on its prepaid duration. Your phone will then revert to your primary home carrier eSIM, restoring normal cellular service and local billing. No physical removal or reinsertion is needed, but you must ensure the travel eSIM profile remains installed for future use. To avoid accidental charges, manually disable the travel eSIM’s data roaming or delete the eSIM profile entirely from your device settings once the trip concludes. Your original number and plan are unaffected throughout this transition.

Deactivating or Keeping the Profile for Future Trips
Once you’re home, decide whether to keep your eSIM profile for future trips or remove it. Most providers let you deactivate the line without deleting it—just toggle it off in your device settings. This saves your data packages for later use. To delete, simply open your phone’s eSIM menu and tap “Remove Cellular Plan.” If you plan to travel again soon, keeping the profile is easier than downloading a new one.
- Open Settings > Cellular or Mobile Data.
- Select the travel eSIM profile you want to deactivate.
- Toggle the line off, or choose “Remove Cellular Plan” to erase it permanently.

Refund Policies and Unused Data Credits
Refund policies for travel eSIMs typically dictate that unused data credits are forfeited upon your return, as most plans are prepaid and non-refundable. To avoid waste, prioritize plans with flexible refund windows, often within 7–30 days of purchase. Some providers offer partial refunds for minimal usage, but only if requested before the plan’s activation or expiry.
- Check if the eSIM has a grace period for full refunds on untouched data.
- Understand that used data credits are non-refundable, even if you return early.
- Verify if unused data can be carried over to your next trip with the same provider.
- Confirm that refunds exclude any promotional bonuses or free data allowances.
Real-World Scenarios: City Hopping vs. Remote Trekking
For city hopping, prioritize an eSIM with generous high-speed data caps across multiple urban zones; you’ll rely on maps, ride-sharing, and instant booking confirmations between metros. The main concept is that remote trekking demands offline-first preparation—ensure your eSIM provider offers robust network roaming agreements with local rural carriers, not just tourist hubs.
The key insight: a city-hop eSIM fails in the backcountry if it lacks extended coverage zones, while a trekking eSIM often overpays for unused urban speed.
Always pre-download offline maps before departing a city hub, as rural signal strength varies unpredictably. For a multi-week mixed trip, choose a single global eSIM with flexible top-ups rather than separate regional plans.
Getting Reliable Speeds in Tokyo Subways
For consistently getting reliable speeds in Tokyo Subways with an eSIM, prioritize providers that use both Docomo and KDDI networks, as single-carrier eSIMs often lose signal in deep tunnels. Before descending, activate your eSIM’s data roaming and manually select the strongest available network. Indoors at stations like Shinjuku, switch your device to 4G/LTE only, since 5G penetration is inconsistent underground. If speed drops, repeat this sequence: disable automatic network selection, manually scan and lock onto a non-congested carrier, and toggle airplane mode for ten seconds to force a fresh handshake.
- Select a multi-carrier eSIM (Docomo/KDDI) before entering the subway.
- Manually lock your phone to 4G/LTE at station level.
- Cycle airplane mode if speeds fall below 5 Mbps between stops.

Staying Reachable on a Patagonian Hike
Staying reachable on a Patagonian hike is less about constant scrolling and more about emergency access and sharing sunset pics from the trail. An eSIM with a regional plan covering Chile and Argentina ensures you connect when you hit a rare patch of signal near a refugio. Pre-download offline maps before you lose coverage; your eSIM acts as a lifeline for weather updates, not Instagram reels. Even on the remote W Trek, a cheap 1GB data pack often outlasts your need to send an “I’m safe” message to home.
Q: Will my eSIM actually work at a campsite in Torres del Paine?
A: Usually only near park lodges or lookout points; expect nothing on the trail itself, but it’s perfect for checking conditions before you head out in the morning.
Comparing Costs Against Traditional Roaming Plans
Comparing costs against traditional roaming plans reveals a stark advantage for eSIMs during travel. Traditional roaming typically charges exorbitant daily fees or per-megabyte rates, leading to bill shock. In contrast, a travel eSIM offers local data packages at flat, predictable rates, often for a fraction of the price. You pay for a set amount of high-speed data upfront, eliminating surprise charges from international carriers. Furthermore, you avoid the cost of a physical SIM card or delivery fees, and can switch to a cheaper provider instantly if needed. While traditional plans lock you into a single expensive rate, eSIMs empower you to select and pay only for the data you actually use, making them the unequivocally smarter financial choice for any trip.
Hidden Fees That Catch Unprepared Travelers
Unprepared travelers often overlook hidden data recovery fees in eSIM plans. These appear when you accidentally use the wrong APN or fail to activate before departure, incurring connection charges. Look for plans with explicit “zero-usage” clauses, as some providers bill for background refreshing. To avoid surprises:
- Verify your device’s network settings before leaving home.
- Disable automatic carrier selection to prevent unintended fallback roaming.
- Confirm the eSIM’s coverage includes your exact destinations, as out-of-zone usage triggers per-megabyte overage.
Even top-up amounts can be misleading; always review the provider’s break down of service fees versus actual data costs.
When a Local Physical SIM Still Makes Sense
A local physical SIM still makes sense when your travel includes remote areas where international eSIM roaming profiles lack optimal partner coverage. For extended stays in a single country, a prepaid local SIM often provides cheaper long-term data than daily eSIM passes. Additionally, if you own an older phone locked to a single carrier or a model without eSIM hardware, a physical SIM becomes your only option for a local connection. Finally, when you need a local phone number for ride-hailing or restaurant reservations, a physical SIM gives you a native number without relying on VoIP.
- Reliable coverage in rural or mountainous regions where eSIM partners are sparse
- Cost-effective for stays longer than two weeks with high data usage
- Essential for phones locked to a network or lacking eSIM support
- Provides a local phone number for services requiring SMS verification